Hi Everyone!
We have already implemented Hub-Spoke topology, and we are able to connect all the resources using IP from on premises network. But it is easier to use domain name instead ip directly from your virtual network. Also, If you want to use Azure Private Link, you need something which will resolve private link dns to respective ip. Other example is you have ASE v2 which comes with own domain but for your internal use you want some custom domain name which is easy to remember and also satisfy business need. So you need some service in Azure which can translate domain name to IP.
Azure provides Private DNS Zones as global service which provides a reliable, secure DNS service to manage and resolve domain names in a virtual network without the need to add a custom DNS solution. By using private DNS zones, we can use our own custom domain names rather than the Azure-provided names available today.
To resolve the records of a private DNS zone from virtual network, we must link the virtual network with the zone. Linked virtual networks have full access and can resolve all DNS records published in the private zone. In our Hub-Spokes topology hub-vnet is the ideal vnet which can be linked with private DNS zone.
What about spokes vnet? Since they are not linked with private DNS zone they will not be able to resolve domain name. Also from your on-premise network it is not possible to resolve azure internal DNS. In this post we will going to solve this issue so that azure resources can be accessible from both spokes and on-premise.
To resolve this issue, we need to deploy DNS forwarder in Azure which will be responsible for resolving all the DNS queries via a server-level forwarder to the Azure-provided DNS 168.63.129.16. Since this is common service we are going to deploy it in ManagementSubnet of hub-vnet.
We will start by creating Private DNS Zone which will be linked hub-vnet. For this demo, I am assuming you already have hub-spoke topology setup and connected with on-premise over VPN.
$ResourceGroupName = "dns-sandbox"
$ZoneName ="virtualmachine.internal"
$hubVnet = Get-AzVirtualNetwork `
-Name "hub-vnet"
$zone = New-AzPrivateDnsZone `
-ResourceGroupName $ResourceGroupName `
-Name $ZoneName
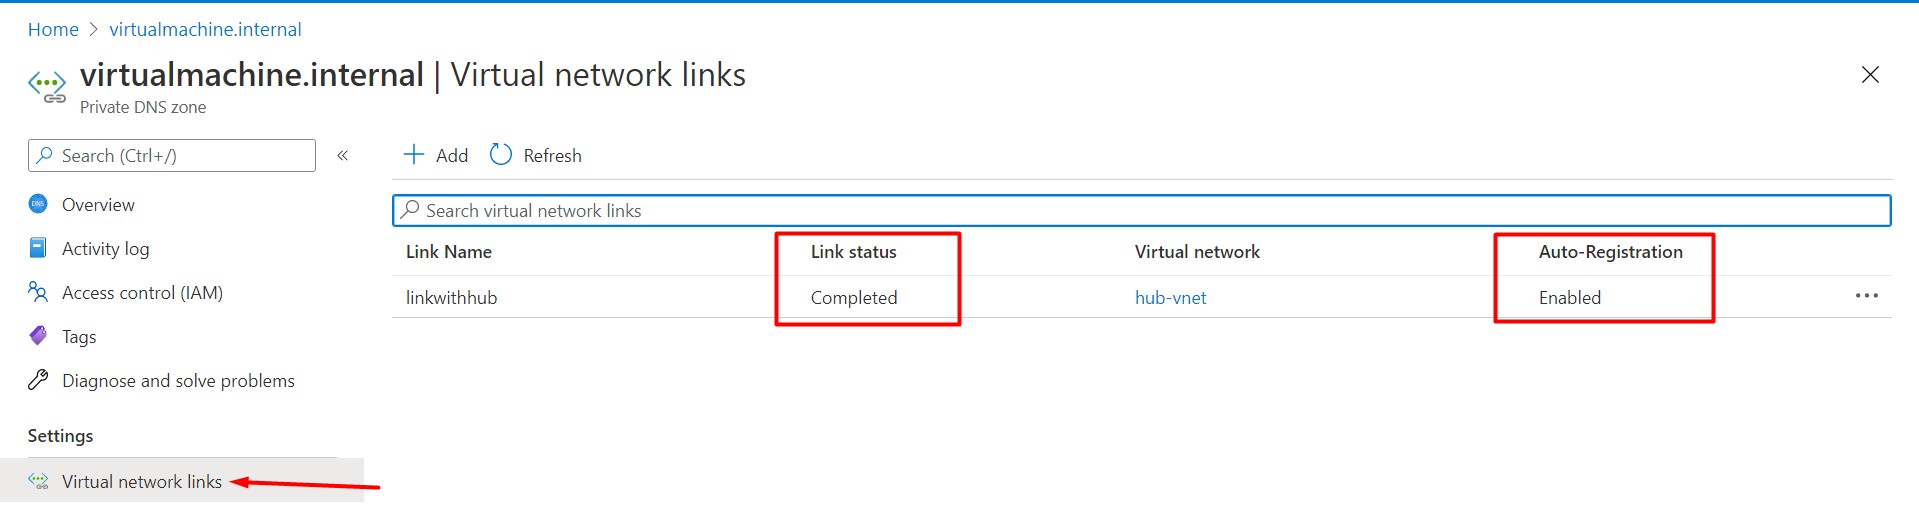
$link = New-AzPrivateDnsVirtualNetworkLink `
-ResourceGroupName $ResourceGroupName `
-ZoneName $ZoneName `
-Name "LinkWithHub" `
-EnableRegistration `
-VirtualNetworkId $hubVnet.IdHere I am taking Zone name as virtualmachine.internal, which means all the virtual machine created in hub-vnet will have dns name like *.virtualmachine.internal. Also I have enabled auto registration for this vnet which means any vm created in this vnet will be auto registered with this zone. Auto registration works only for virtual machines. For all other resources, you can create DNS records manually in the private DNS zone linked to the virtual network. Please note, you can enable auto registration process for vnet only for single zone. Once completed, go to resource group from azure portal, click on newly created on private DNS zone and you should have something like this -
As I mentioned earlier, we will need DNS forwarder in hub-vnet. Let’s create that now with DNS feature enabled.
$LocationName = "centralindia"
$ResourceGroupName = "vm-sandbox"
$VMName = "DNSForwarder"
$ComputerName = $VMName
$VMSize = "Standard_B1ms"

$NetworkName = "hub-vnet"
$SubnetName = "ManagementSubnet"
$NICName = "$($VMName)-Nic"

$subnetAdressSpace = "10.10.1.0/24"

$networkSecurityGroup = New-AzNetworkSecurityGroup `
                           -ResourceGroupName $ResourceGroupName `
                           -Location $LocationName `
                           -Name "$($VMName)-Nsg"

$Vnet = Get-AzVirtualNetwork `
            -Name $NetworkName
$SingleSubnet = Set-AzVirtualNetworkSubnetConfig `
                   -VirtualNetwork $Vnet `
                   -AddressPrefix $subnetAdressSpace `
                   -Name $SubnetName

$Vnet = Set-AzVirtualNetwork `
           -VirtualNetwork $VNET

$SingleSubnet = Get-AzVirtualNetworkSubnetConfig `
                   -VirtualNetwork $Vnet `
                   -Name $SubnetName

$NIC = Get-AzNetworkInterface `
          -Name $NICName
$PipRequired = "N"
if($PipRequired -eq "Y"){
    $Pip = New-AzPublicIpAddress `
              -ResourceGroupName $ResourceGroupName `
              -Location $LocationName `
              -AllocationMethod Dynamic `
              -Sku Basic `
              -Name "$($VMName)-PublicIp"

$ipconfig = New-AzNetworkInterfaceIpConfig `
               -Name "$($VMName)-IpConfig" `
               -Subnet $SingleSubnet -PublicIpAddress $Pip
}
else {
$ipconfig = New-AzNetworkInterfaceIpConfig `
               -Name "$($VMName)-IpConfig" `
               -Subnet $SingleSubnet
}

$NIC = New-AzNetworkInterface `
          -Name $NICName `
          -ResourceGroupName $ResourceGroupName `
          -Location $LocationName `
          -IpConfiguration $ipconfig `
          -NetworkSecurityGroup $networkSecurityGroup

$Credential = Get-Credential `
                 -Message "Enter a username and password for the virtual machine"

$VirtualMachine = New-AzVMConfig `
                     -VMName $VMName `
                     -VMSize $VMSize

$VirtualMachine = Set-AzVMBootDiagnostic `
                     -VM $VirtualMachine `
                     -Disable

$VirtualMachine = Set-AzVMOperatingSystem `
                     -VM $VirtualMachine `
                     -Windows `
                     -ComputerName $ComputerName `
                     -Credential $Credential `
                     -ProvisionVMAgent `
                     -EnableAutoUpdate

$VirtualMachine = Add-AzVMNetworkInterface `
                     -VM $VirtualMachine `
                     -Id $NIC.Id
$VirtualMachine = Set-AzVMSourceImage `
                     -VM $VirtualMachine `
                     -PublisherName 'MicrosoftWindowsServer' `
                     -Offer 'WindowsServer' `
                     -Skus '2019-Datacenter' `
                     -Version latest
$VirtualMachine = Set-AzVMOSDisk `
                     -VM $VirtualMachine `
                     -Name "$($VMName)-OsDisk" `
                     -StorageAccountType "Standard_LRS" `
                     -Windows `
                     -DiskSizeInGB 127 `
                     -CreateOption FromImage

New-AzVM `
   -ResourceGroupName $ResourceGroupName `
   -Location $LocationName `
   -VM $VirtualMachine `
   -Verbose


# Install DNS
$PublicSettings = '{"commandToExecute":"powershell Install-WindowsFeature -Name DNS -IncludeManagementTools"}'

Set-AzVMExtension `
        -ExtensionName "DNS" `
        -ResourceGroupName $ResourceGroupName `
        -VMName $VMName `
        -Publisher "Microsoft.Compute" `
        -ExtensionType "CustomScriptExtension" -TypeHandlerVersion 1.4 `
        -SettingString $PublicSettings -Location $LocationName
Once completed, go to Private DNS Zone dashboard from Azure Portal, and you will see there is A record added for this vm automatically. Thanks to AutoRegistered! If you delete this vm, this record will be deregister automatically as well.
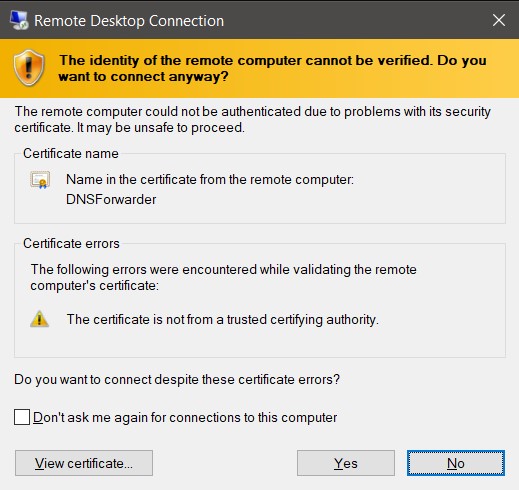
Now connect with this VM from on-prem (assuming you have connected with VPN) and try to connect with dnsforwarder.virtualmachine.internal. Oops! unable to connect. We will get back to this later. but for now lets connect with private ip.
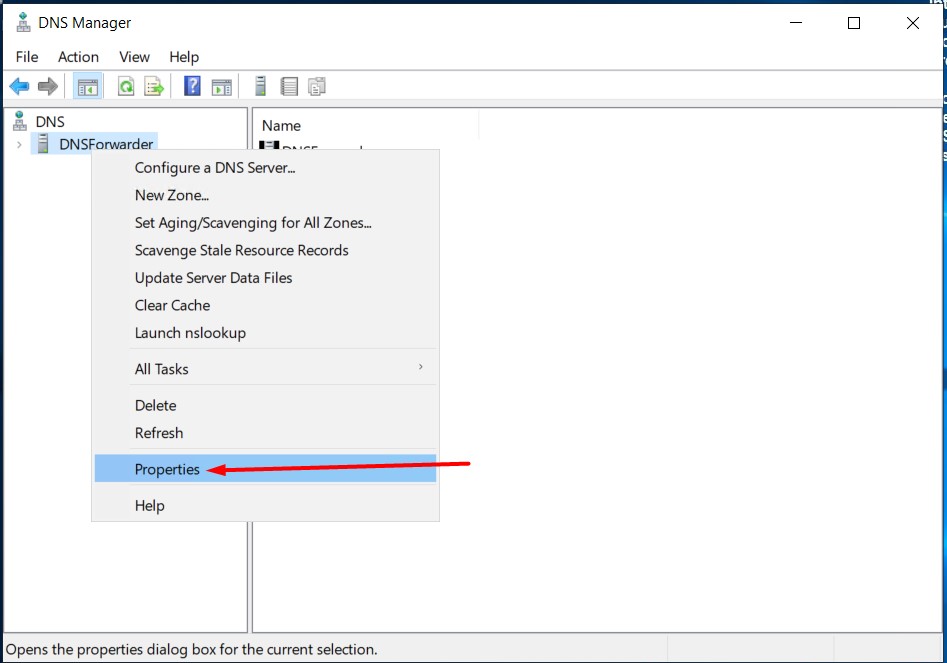
Once logged in, search for DNS Manager. Right Click on the DNS Server name and click on Properties.
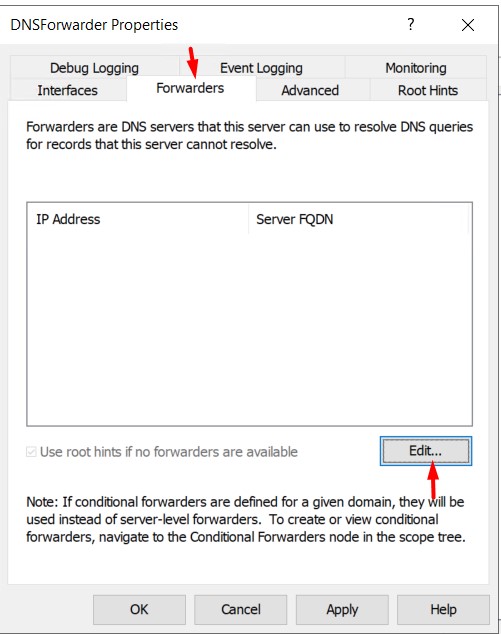
Now go to Forwarder Tab and click on Edit.
Add Azure DNS 168.63.129.16 and click on OK.
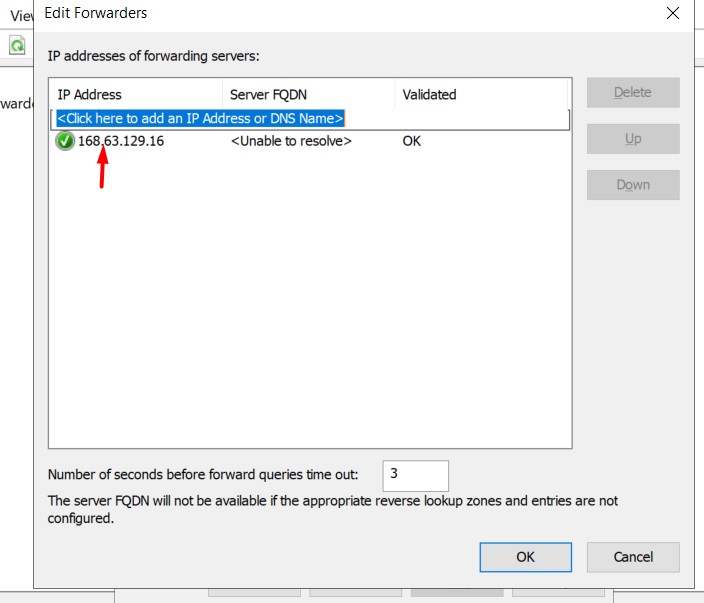
We just setup a DNS forwarder, this will help us to resolute any domain name from Azure DNS by azure recursive resolver.
Next step to setup this DNS forwarder server for all virtual networks so that all the domain name resolution should be done using this server only.
$dnsserver = "10.10.1.4"

$hubVnet = Get-AzVirtualNetwork `
              -Name "hub-vnet"

$hubVnet.DhcpOptions.DnsServers.Clear();
$hubVnet.DhcpOptions.DnsServers.Add($dnsserver)
Set-AzVirtualNetwork -VirtualNetwork $hubVnet

$spoke1Vnet = Get-AzVirtualNetwork `
              -Name "spoke1-vnet"

$spoke1Vnet.DhcpOptions.DnsServers.Clear();
$spoke1Vnet.DhcpOptions.DnsServers.Add($dnsserver)
Set-AzVirtualNetwork -VirtualNetwork $spoke1Vnet


$spoke2Vnet = Get-AzVirtualNetwork `
              -Name "spoke2-vnet"

$spoke2Vnet.DhcpOptions.DnsServers.Clear();
$spoke2Vnet.DhcpOptions.DnsServers.Add($dnsserver)
Set-AzVirtualNetwork -VirtualNetwork $spoke2Vnet
You need to restart all servers to take this effect. Also you need to delete the existing Point to Site VPN Gateway and reinstall it.
Now connect your VPN and connect the vm using DNS this time (I will assume you do not have any local DNS server setup).

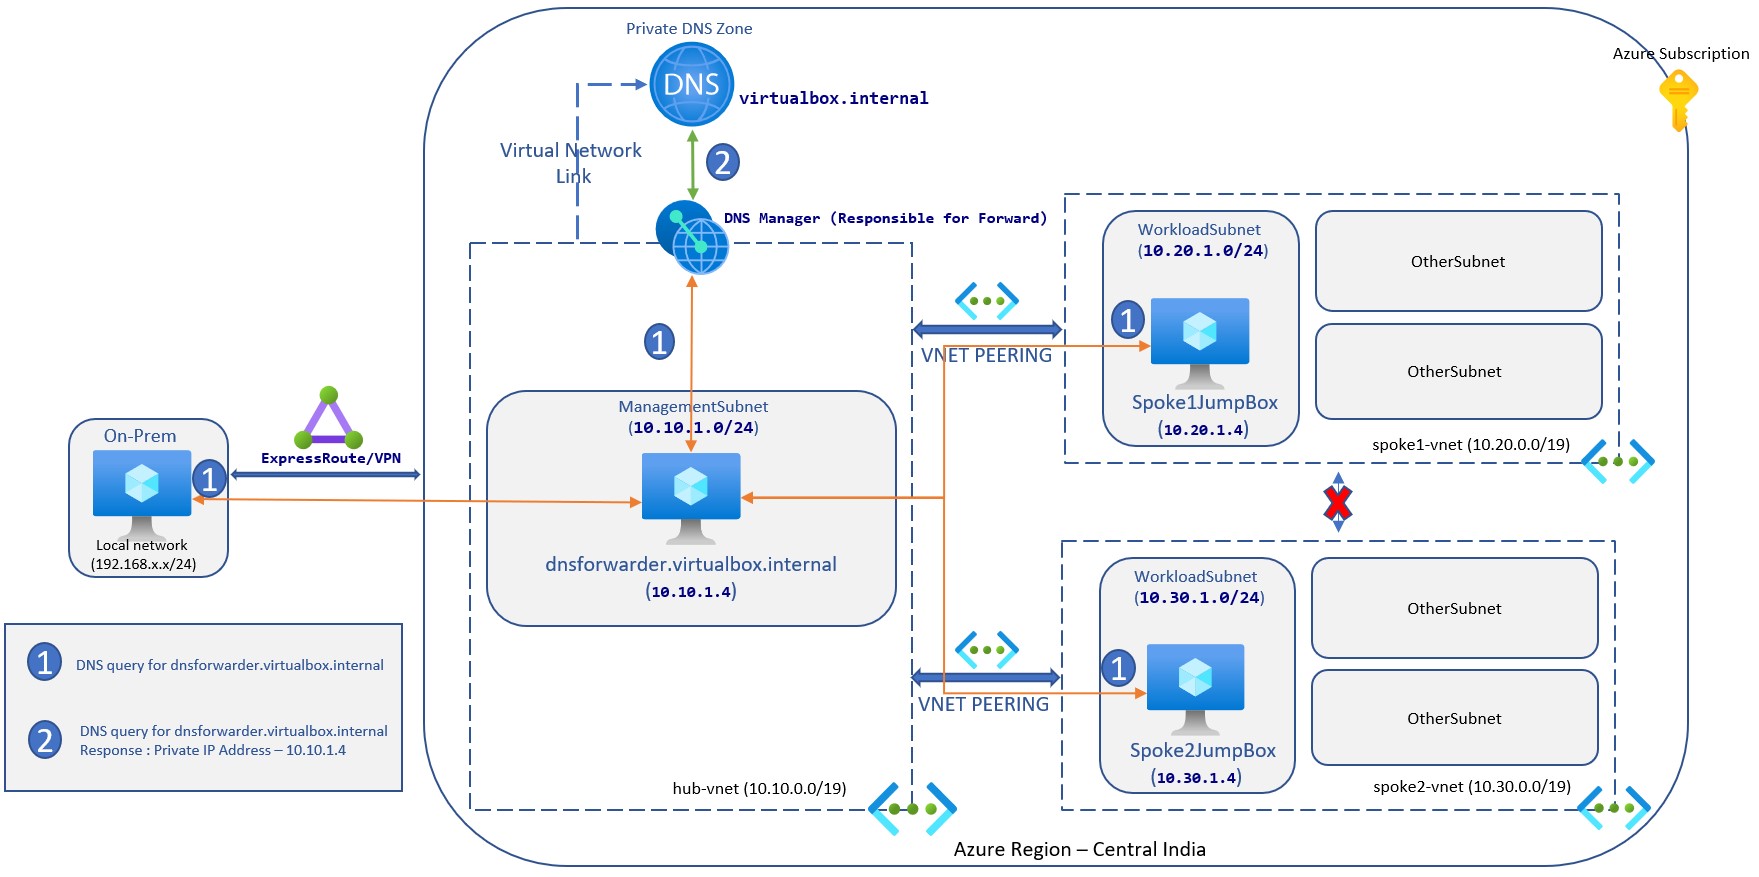
If you try the same from Spoke virtual networks it will work because all the virtual network is now pointed to DNS forwarder. We just implemented below architecture.
Comments